How to Earn Real Money Unlimited with Whaff (Hacked)

Whaff reward is a money making app though which you can earn money and redeem it to to  your PayPal account, gift cards etc. Earn unlimited money online with whaff rewards. Whaff app is very simple to use and it is trusted app. You can earn money by doing some task and by referring friends.


How to Earn Money Online Using Whaff Hack :-

Exclusive Free $10 Shopping from a Chinese eCommercial Site

Yap, You heard it right. This time a Chinese e-Commercial site is giving you free $10 Dollar for shopping world wide and a life time income by refer a friend. So, just follow this steps and earn easily..

Boost your Click-Through Rate Effectively for SEO

Read on to find out about some of the most important aspects of CTR:

  • Meta tags and indexing

  • Controlling the URL

  • Serp

  • Authorship

Boost your Click-Through Rate

Why You should update your Blog regularly

Sorry Guys! I was in a trouble that's why I wasn't able to update my Blog.
The most important work that every blogger
do in blogging is "Content Creation" or so
called updating blog. Everyone will
recommend you to update your blog everyday
regularly but my recommendation depends on
the blog niche and content that provide. Well,
you guys always try to update your blog
regularly in order to serve your readers better,
impress search engines to gain more traffic
and also to earn more income. But sometimes
suddenly any incident happens and you're
completely unable to update your blog and at
least you've not touched your blog more than
one week. So, do you know what happens
when you don't update blog? Then today, I'm
gonna share that behind story that every
blogger should know.

The first and really bad thing for bloggers
happens is that blog traffic decreases. We
don't any kind of decrease in blogging but we
love increase. The traffic decreases by several
reasons. Lets suppose your blog's social
accounts have millions of followers and you
also update those social accounts with your
new blog posts links and some percentage of
regular traffic is coming from there. So, when
no update, those social accounts will also not
be updated and you may be loosing traffic.
There will be thousands of fans of your blog
who'll be notified by any method about your
blog update and they may only land just for
reading out new latest post and if they don't
receive any notification then they also don't
arrive on your blog.
It's true that you will lose your earnings if you
don't update blog for long time. The reason is
traffic decreases and ad serving statistics also
decreases. You may be using any PPC or CPM
or any other traffic to revenue converting
advertising network and their earning
depends on the traffic you've so simply if you
loose traffic than you may also loose earning.
Yes, if the earning source is different like
direct banner advertising in which advertiser
put banner for 30 days on blog or paid posts
than you may not face earning drop.
Believe me or not, it's true that readers don't
like inactive blogs. Just take an example, will
you to like to eat 2 days old worst food? You'll
probably avoid eating it and will look for the
fresh food. Just like this, readers don't like to
read old content or your readers may already
have read it. They want new fresh content to
read and become your loyal readers. Yeah! If
you're unable to update your blog than you
should notify your readers that you'll be
inactive for some days in updating your blog
due to any incident. This will not loose
readers hope and they won't unsubscribe you.
Search engines keep your blog crawling again
and again and it's good to have great crawl
rate. They also want new fresh content to
crawl and rank it better in search results to
help you drive more traffic. No doubt,
rankings mostly depends on the on-page SEO
factors but getting search engines crawling
our blog is good. The more search engines
crawl the blog, the chances are more to get
better rank in SERP. But when we don't
update our blog, crawl rate decreases and it
may affect on current rankings. It may also
cause to decrease search traffic.
When you don't update blog work also
increases. Do you know what kind of work?
It's all about blogging work. Let me tell you
more about it. When you'll come back to
blogging, you'll find too many awaiting
moderation comments, too many awaiting
reply to comments, too many emails to check
and reply, too many notifications and some
other small small things that we do usually in
blogging. After that, we also want to recover
the rankings, earnings and readerships. So,
while getting restart you'll need to face big
work in initial once everything is back like
previous.
In case if you don't want to face these things
than you may be looking for the solutions of
this and we've also got them. Here is what
you can do if you face this kind of case.
1. Hire Authors : Multiple authors make it
easy to work together. If one author is
unable to update blog than second one can
do it. You can hire any good author to do
work when you're busy.
2. Schedule Posts : In case, if you're going
out just suppose on vacation than you can
already write some posts and schedule
them. They'll be published automatically
on time.

Actually, I was also inactive some days, you
guys might have noticed and I faced this all. I
thought why not write an update on it. Hope
you liked this article and please keep reading
our articles. Have a nice day!

Get Google Adsense Account Approved in 1 hour

Quick Google Adsense Approval tricks How To Get An Approved Google Adsense Account in 1 hour?Now a day Google Adsense is the only program that new or old bloggers finds very difficult to get approved. As you know that Google Adsense is highly CPC program, but to get approval is bit difficult, few years back there were no such restriction by Google, but now a day lot of bloggers even Pro blogger saying that they can’t get Google Adsense Account, So today I discover one of the most used approval method of Google Adsense.

How to Make a Contact Page in Blogger

Do you want to make a contact page in your blog so your readers don't have to leave your website to email you? 

Here's an easy way to make a contact form in Blogger -- using Google Drive (formerly Docs). 
I tweaked its instructions to make it even easier to

Customize Your Blogger Label With CSS3 Effects


label_cloud_widget_styleTag Clouds are used to display all the categories or labels present in a blog. The inherent design of this widget in Blogger is very minimal and has a lot of space for creativity. In this post we will be showing  Label Widget designs which you can easily integrate within your blog. We will design our labels like 3D

Floating Twitter and Facebook Share Buttons (with Counter)

You can see in some Website or on Blog with share button, and also some blog use Floating Share Button. Share button is very need to every blog. So, this floating Share Button is cool and also with share counter. Its look good that's why I'm also Using this (You can See in the Left side). So, here is an excellent widget that will float vertically next to your individual blog posts.  These  engaging

Make Money With Web Hosting (Affiliate Programs)

Making money online is one the most searched thing on the internet. Some of people have succeed in this and others are still finding it. Well, There are many ways to make money online on the internet and I also had discussed some of them here. Today I'm going to share another way of earning bucks online which is specially for Bloggers and Internet Marketers. It is making extra money web hosting affiliate programs

How to Get High PR Backlinks To Increase Organic Traffic

High PR Backlinks
High PR Backlinks - Tell me the name of any blogger or webmaster who don't want this thing ! It is always wanted by every blogger that he/she should achieve a lot of High PR Backlinks which help us a lot to increase the Google search organic traffic. Newbies and Pros are trying different methods to get backlinks from high page rank blogs which are also shared on many blogs and some of

Remove or Delete Labels From Blogger Posts

Many bloggers might find labels below posts (or post titles) unnecessary, as long as they are already in the blog's sidebar. In this tutorial we will learn how to remove them manually. To hide labels from the blogger post footer (or below post title), you could simply uncheck the "Labels" option,

Index Your Blogs Fast In Search Engines

Indexing One's Website in Search engines and getting a good number of visitors is A Wet Dream of every site owner!

7 Best Author Box Plugins for WordPress

Screen Shot 2013-09-04 at 9.56.51 PMIf you are already using WordPress on your blog or website you surely know the power your company can achieve with plugins, and how important they are. Not only they help us to cover a lot of needs, but they are easy to use and install and have a great community that supports them. But all the good parts have its bad side, and this is linked to the large number of plugins for Word Press that are out there. This is why finding a specific plugin can become real nightmare.
Rank Author Plugins Are A Must For Any Blog
For several months, experts have been commenting on the influence of the Author Rank in SEO, it is necessary to clear all possible doubts. What is Author Rank? The Author Rank or author brand is very important in any blog because, besides being our signature content author, it improves our personal brand on the Internet.
It is not just about displaying your image in Google results, not even a matter of personal ego; it is much more than that. The Author Rank allows the network to become visible to the author and out of the supposed shadow before simply signing an article with our name. It allows conveying confidence, professionalism to our readers and so on. Another important aspect is that it helps to increase the number of followers of our blog and social networking profiles.
Does Author Rank have an impact on SEO? The Author Rank positively influences the SEO and PageRank in our blog. For this reason, we must incorporate information authoring plugins.  How do you start using the Author Rank on your blog? To insert the brand image is as simple as installing any of the following Rank Author plugins for Word Press. The configuration of each of these plugins Author Rank is very simple, and it requires no computer knowledge to get it ready.
Best Rank Author Plugins for Word Press
If you run a website or blog with a single author, this creates more of a headache, it is expected that the thing is complicated when managed by a team, so imagine alone. Clearly, the key to success is communication so after taking this into account just give some attention to details. Thanks to the best Author Box Word Press plugins, you will be able to walk towards online success:
1.  Author Sure: Build your brand on Google search results with this plugin.
Features:
  • It’s easy to get the Google verification authoring.
  • Supports multiple authors.
  • Create links to social networking profiles Facebook, Twitter, LinkedIn , Pinterest , YouTube and Skype and Google+.
  • Creates a link to your Google+ page.
  • Improve the SEO of your blog.
2.  Author Information: It replaces the classic author link your Google+ profile.
Features:
  • Establish the content authorship by linking to your Google+ profile.
  • Very easy to configure.
  • Improves the SEO of your blog.
3.  Social WP SEO Booster:  Activate this plugin and boost your position through a fantastic mix of strategies (SEO and Social).
Features:
  • Shareable with Word Press SEO by Yoast and All in One SEO package.
  • Integrates micro formats to enrich our content.
  • Integrates content authoring for one or more authors.
  • Improve the SEO of your blog.
  • Includes the star rating associated with the author.
  • Author Rank Plugin: WP Social SEO Booster.
4. Social Author Bio:  Social Author Bio automatically adds a author bio box along with Gravatar and social icons.
Features:
  • Easy configuration.
  • Integrates content authoring for one or more authors.
  • Improve the SEO of your blog.
  • Integrates social networking profiles.
5.  Editorial Calendar:  It schedules entries visually.
  • Something strange in Word Press is its way of arranging tickets (drafts and schedules) more visually pleasing, not only in list form. Well, with Editorial Calendar can be displayed simultaneously all in a convenient calendar with quick editing functions and even drag and drop to rearrange Publication dates and times much easier.

6.  Authors Plus: It allows multiple authors for an entry.
  • Two heads are better than one so that an item that combines the knowledge of two or more authors can look better and be more complete than one with a single creator. Allowing Co – Authors Plus is the allocation of several authors in editing an entry in its publication in the feed for each author. Each author will have permissions to perform actions on the site: delete entries, edit pages, post, moderate comments, upload media files, install themes and plugins, etc. This brings a couple of interesting alternatives to users. It even hides all menus and other unnecessary elements (such as forms of SEO plugins) for each author, creating an atmosphere of writing step easier.
7.  Audit Trail:  This is like the so-called Big Brother.
  • This plugin will record all activity within the site authors: new tickets, tickets issued by each and earlier drafts, time log in and log out, IP and solutions for suspicious or interested in knowing even the slightest movement.

It is all about finding the best plugins that will surely release headaches and concerns. Get to manage your posts one by one without a single problem.  Plugins will help you hide what you don’t like and highlight what you do. Some are even more specific and practical without making the error window with the typical message “you are not authorized to edit this section”, etc.
The ultimate plugin goes along with social networks. To allow a better link between authors and readers, it may be good to facilitate links to social media profile. Apart of implementing author box plugins consider writing a short biography, useful for sites that do not have a special page for a more detailed review of the information collaborators. Author Profile Avatars, widgets, lists and many other tools will allow you to achieve your online goals.
Wrapping it up, a simple widget can make a significant difference.  Some are similar to a block that is embedded with subscriptions of Facebook and has some minute detail editing as authors to exclude, the size of the profile pictures and the number of people to show.

How to Backup your Gmail Account

This past weekend over 150,000 Internet users woke up to find their Gmail inboxes, contacts and chat conversations gone. The issue, according to Google, was caused by a storage software update that introduced an unexpected bug. But while the company has since begun restoring data from tape backups and will likely offer some form of compensation where applicable, the incident served as a reminder that no matter how reliable some cloud-based services are, they are certainly not infallible, and thus it might be prudent to have your own backup ready just in case things go amiss.
There are numerous ways to backup your Gmail data and deciding which way to go will largely depend on the level of effort you want to put into it. You could simply setup Gmail to forward all your mails to another email account and call it a day, for instance. But there are also a handful of other options that offer a bit more flexibility and convenience.
Below, we've listed a few of them, so you can choose whichever best suits your needs.
Use a standalone backup program
Gmail Backup is a simple and easy-to-setup free alternative that does exactly what its name says. Upon installation, just type in your credentials and it will begin downloading all your e-mails, backing them up securely, and allowing you to restore them to your account should the unthinkable happen. The program is free and Windows-only. Their website seems to be down due to the increased load in the past few days.
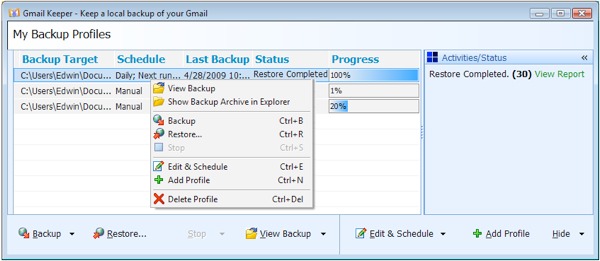
If you're willing to shell out $20, Gmail Keeper will back up Gmail messages or messages from a Google Apps Mail account as a .zip file to a local disk. It supports multiple accounts and even stores labels associated with each message, while those concerned about privacy can encrypt their mail and password protect it.
Third-party Web service
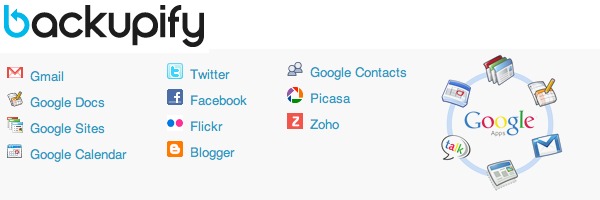
Backupify is a handy tool that automatically performs scheduled backups for a number of popular online services including Google Apps, Facebook, Twitter and others. You won't have to put too much effort into the whole backup process -- just supply the login credentials of the sites you want backed up and Backupify takes care of the rest. Be aware though that you're essentially moving your info from one cloud to another.
The site offers both free and paid accounts with varying limitations, but given the recent Gmail blunder, Backupify is taking the opportunity to entice new users with a coupon code "savegmail" for a year of free backups with one of their premium plans, so there's really no reason for not giving it a shot.
Use a desktop mail client
This is probably the most common approach and should take just a few minutes to set up. Gmail offers access to all your mail through desktop clients such as Apple Mail, Microsoft Outlook, Mozilla Thunderbird, and many others. The latter is free and available on all major operating systems, so if you're doing this for the first time and especially if you're only planning to use it for backups rather than as your primary client, then Thunderbird might be the way to go.
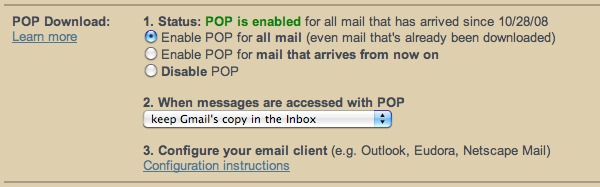
For those unfamiliar with the setup process: After signing into Gmail, click the "gear" in the upper-right corner, choose Mail settings, then load the "Forwarding and POP/IMAP" tab. Enable POP for all mail and set Gmail to keep its copy.
You'll then need to setup your desktop mail client to retrieve your emails. Google offers step-by-step instructions for a number of clients and Thunderbird's automatic configuration is usually spot on getting your settings right with just your username and password -- but make sure to use POP instead of IMAP for one-way message transfers.
Messages will be downloaded automatically each time you launch Thunderbird and stored into your profile folder -- which you can back up standalone as well for some added security. It's pretty straightforward, but for those who prefer to use the web-based Gmail interface, remembering to run Thunderbird or whatever desktop email client every once in a while might be more work than they're willing to deal with.

How to Install Windows 8 from USB for Duel Boot


Install Windows 8 From a USB Drive, Dual-boot with XP, Vista and 7
If you're familiar with the process, there isn't much for you to see here, but this should serve as a quick confidence booster for anyone who hasn't installed an operating system recently.
Step One
Download Windows 8 and the Windows 7 USB/DVD tool
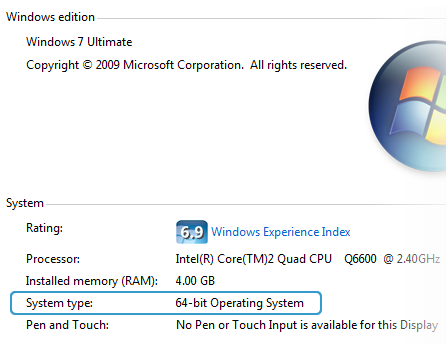
If you're not sure what version of Windows 8 to download, we'd recommend the 64-bit build, especially if your system is relatively modern. You can read more about the difference between 32-bit and 64-bit operating systems here and the download page linked above provides system requirements for each architecture. The short of it: Windows 8 64-bit requires an extra 1GB of RAM and 4GB of storage -- negligible for most users. Also, before you ask, the Windows 7 USB/DVD tool will work fine with Windows 8.
Step Two
Create a bootable Windows 8 USB drive
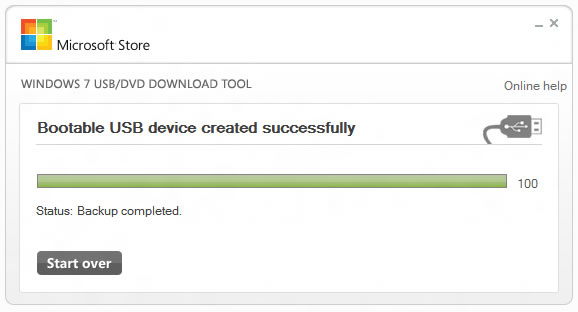
Naturally, to create a bootable USB drive, you'll have to insert one and it needs to be 4GB or larger. Install the Windows 7 USB/DVD tool. Once the utility opens, you should be able to browse for and select the Windows 8 ISO you downloaded as well as the USB drive you inserted. It's worth noting that your USB drive will be wiped, so save anything important. The process takes about five minutes depending on the speed of your drive. You'll see a message that reads "backup completed" when it's done.
Step Three
Install the Windows 8 Release Preview (key: TK8TP-9JN6P-7X7WW-RFFTV-B7QPF)
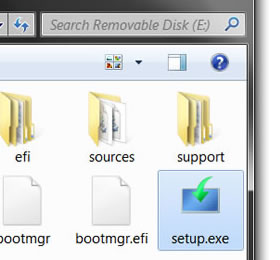
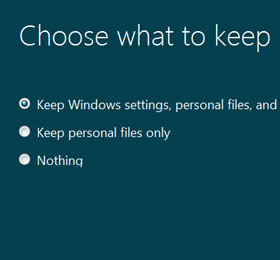
Needless to say, back up anything important before proceeding. If you plan to upgrade or overwrite your installation of Windows XP, Vista or 7, open the root directory of your USB drive in Windows Explorer and launch Setup.exe to begin. You'll get to choose between the two. Windows 7 users should have a painless upgrade as programs, Windows settings as well as user accounts and files are imported. However, Windows 8 won't save programs from Vista and it won't save programs or Windows settings from XP.
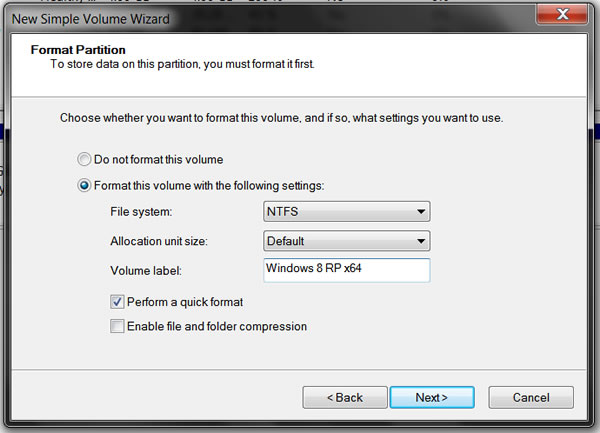
If you want to dual boot Windows 8 with your existing operating system, you'll have to install a second storage device or create a new partition. The former is relatively self-explanatory, just attach the drive and choose it during the installation process. The latter, however, requires a little more effort. Vista and 7 users can create a new partition with Windows' Disk Management application (Start > search for Disk Management). Once the application loads, you should see your operating system's drive. Follow these steps:
  • Right click the drive that you want to house Windows 8 and choose "Shrink Volume" (Windows 8 64-bit requires at least 20GB, so shrink your current partition accordingly)
  • Right click the new "Unallocated" space and create a "New Simple Volume"
  • Choose the next available drive letter and quick format the partition with NTFS (you can name the volume anything, but we'd suggest something like Windows 8 RP x64)
Windows XP users will have make partition adjustments with a third-party tool such as Partition Logic, but you'll do the same thing: shrink one volume to create another. It should be smooth sailing from here as Microsoft's installation process guides you through everything. Just boot off your Windows 8 USB drive, choose a custom installation and select your newly created partition. If you're having trouble launching the USB drive, you probably just have to put it ahead of your system drive in the BIOS (look for boot options).
If you want to get rid of Windows 8, load your primary OS and launch partition software (again, Disk Management for Vista or 7 users). Delete the Windows 8 volume and extend your remaining partition into the freshly unallocated space. Removing Windows 8 could screw up your bootloader and prevent your original OS from starting properly. Don't panic, this is a simple fix. Windows Vista and 7 users can use the automatic Startup Repair, while Windows XP users will have to get their hands a little dirtier.

Difference Between 32-bit and 64-bit Operating Systems

With the upcoming release of Windows 8.1, the question is raised again on whether you should install the 32-bit version (x86) of the operating system or move up to 64-bit (x64). http://goolier.com/wp-content/uploads/2012/09/RL15.jpg This is something that's been asked since the introduction of consumer-level processors bearing the “x64” nomenclature. It feels like just yesterday that Intel and AMD fanboys were at odds over the Athlon 64. At that time and even as recently as the introduction of Windows Vista, software and drivers for 64-bit setups were slim-pickings.
Analogous to the shift from 16 to 32-bit computing, the jump to 64-bit has been a slow one. Windows XP x64 never took off, though 64-bit versions of Vista did, thankfully. The ride was a bumpy one, but hardware manufacturers and software developers alike have finally widely adopted the 64-bit architecture - and there’s no turning back now.
At this point in time, nearly everyone is on the same page about the transition. If your old video card and printer have yet to receive 64-bit compatible drivers, odds are they won’t be getting any. A boatload of legacy hardware support was dropped with Windows Vista, and Windows 7 certainly won’t pick it back up, regardless of which version you install.
Now, you’re probably wondering why 64-bit operating systems are being phased in and what benefits they deliver over their 32-bit predecessors – both legitimate questions. One of the most commonly cited differences is that the 32-bit architecture has a memory access limit of 4GB (2^32 bytes). This permits you to use about 2.75-3.5GB of RAM after IO reservations are factored in.
On paper, the 64-bit architecture can address 16 exabytes of memory (2^64), or more than 4 billion times that of its precursor. Consumer editions of Windows Vista permit from 8GB to 128GB of physical memory to be accessed, depending on the version. Windows 7 bumps that up to 192GB with the Professional version and above.
Other benefits of running a 64-bit OS include enhanced security with hardware-backed DEP, Kernel Patch Protection and mandatory driver signing.
This is all just scratching the surface, but I suppose the real question should be:
Why shouldn’t you install Windows x64?
The short answer is that you should go with Windows 7 64-bit unless you’re running a system well into its antiquity where driver support is going to become an issue.
Microsoft has useful online tools that can scan your system and external peripherals and give you an outlook of what's currently supported and what's not. A few useful links:
- Windows Vista Compatibility Center
- Windows 7 Compatibility Center (not yet available)
- Windows 7 Upgrade Advisor

Computer Tips & Tricks Everyone Should Know [Mega Post]

Computer Tips & Tricks Everyone Should Know
Many hardcore computer users might think themselves above learning new tricks, but there's always new things to learn that will help improve your skills. Our bet: you will find at least one useful thing here that you didn't know before.
Inspired and with the help of this AskReddit discussion, we’ve compiled some of the most handy computer tricks you might not be taking advantage of. Our ultimate goal is to help you become more productive by shaving valuable seconds off your workflow. Of course, you can always pass along these tips to your not-so-savvy friends and family members to help them become better PC users as well.

General Tricks

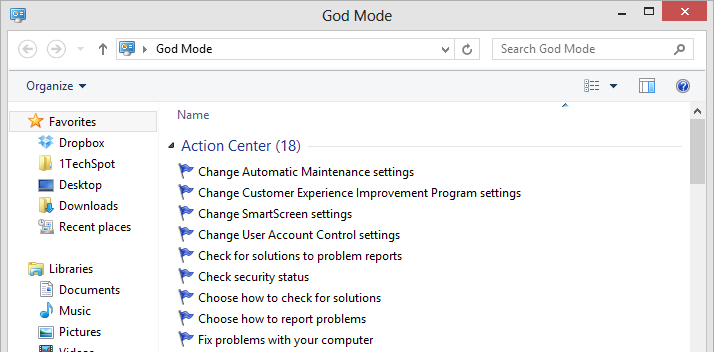
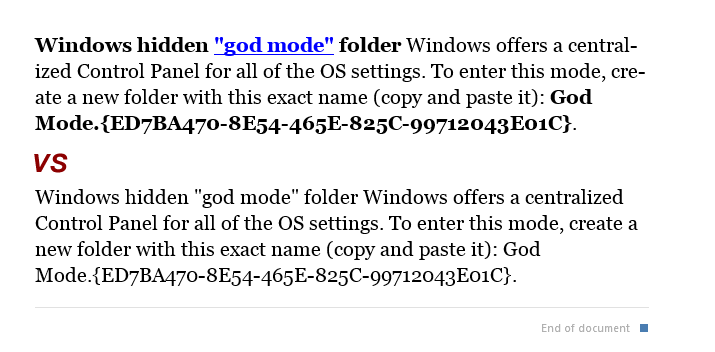
Windows hidden "god mode" folder Windows offers a centralized Control Panel for all of the OS settings, which makes it easy for users to tweak everything from desktop background to setting up a VPN. To enter this mode, create a new folder with this exact name (copy and paste it): God Mode.{ED7BA470-8E54-465E-825C-99712043E01C}. The folder icon will change to a Control Panel-style icon, and you will be able to jump in and change all kinds of settings. Note: Don't try this on Windows Vista 64-bit as it's known to cause a reboot loop.
Use Problem Steps Recorder This handy tool automatically records any mouse clicks and takes screenshots for you. If you need tech assistance with your computer, go to Run by typing Windows + R, and then type "psr." Use the tool and by the time you are finished, you can send this information, neatly compiled automatically, to the person helping you with the issue. It will make the process of finding the problem much easier for them, which means you will be able to get your system up and running faster.
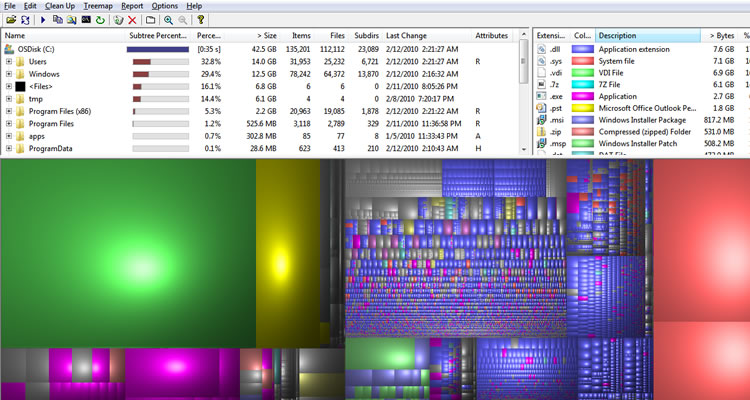
Find/Delete large files wasting space A handy tool called WinDirStat (Windows Directory Statistics) can be used to easily find which files and folders are taking up the most space on your drive. From there, you can delete them and open up a ton of storage space.
Reduce the number of programs running at startup If your PC is taking too long to boot, it’s probably because you have far too many programs running at startup. Reducing this is easy, it will make your PC launch noticeably faster and lighter upon first load. To change the items running at startup, go to Run using the hotkey Windows key + R, and type "msconfig." A small window will appear (see the screenshot below), select the Startup tab. From here you will be able to turn off many startup programs, which can shave several seconds (or minutes) off your boot time. (Note Windows 8 has moved this functionality to the Task Manager). Try to make sure you research what you are turning off as some processes might be needed by third party programs or drivers you have installed.

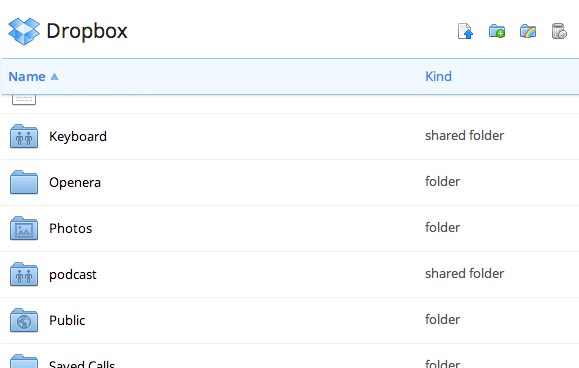
Cloud backup important files If you’re working on a critical paper for school, work, or any other major project, make sure you are backing up the file not just locally. You can use services like Dropbox, Google Drive, or any of the other popular cloud storage solution which will do the legwork for you on the background. Of course, you can also throw the files on a thumb drive or external HDD just to be safe but backing up to the cloud can be done seamlessly which is twice the advantage.
Typing Tricks

Delete an entire word Instead of deleting a single letter, pressing CTRL + BKSP will delete the entire word behind the cursor. This makes deleting text quicker if you screw up a whole word.
Move Cursor to beginning of the next or previous word Moving the cursor around manually while typing is a great way to make your work take longer than it needs to. To speed of the process, move the cursor around with keyboard shortcuts. To move it to the beginning of the previous word, use CTRL + Left Arrow. To move it to the beginning of the next word, use CTRL + Right Arrow. In OS X you can accomplish the same using the Option key.
Making sub and superscript text If you need to make sub or superscript text (think exponents for superscript), press CTRL + = for subscript and CTRL + SHIFT + = for superscript.
Paste plain text of what was copied When you copy text from any source, programs will usually copy any formatting that comes with it. To paste this as plain text, press CTRL + Shift + V instead of the standard CTRL + V, and the system will paste unformatted text.
Note that many programs follow this parameter (Chrome, Firefox, etc.) but not all, particularly Microsoft programs like Word or Outlook. For those there's a few alternatives that go beyond copying and pasting in Notepad: 1) CTRL + ALT + V will show a 'paste special' dialog box. 2) CTRL + Spacebar will remove formatting in already pasted text. 3) Download Puretext and choose a hotkey to always paste plain text with it.
Keyboard Shortcuts

Copy only active window to clipboard Normally, the Print Screen key copies the entire display (or two displays if you got them), ALT + Print Screen only copies the currently active window to the clipboard. Whether taking a screenshot to diagnose a problem, or just because you want to show something to a friend, this will come in handy.
Fix those little mistakes Did you know you can undo almost any action? CTRL + Z is the ultimate hot key, and for sure you knew about it already, however note that undo doesn’t just apply to typing. If you accidentally delete or move a file, you can hit CTRL + Z to bring it right back to where it was. In Chrome and Firefox you can also undo closing a tab using CTRL + SHIFT + T.
Cycle through open windows Pressing ALT+TAB allows you to cycle through currently open windows. This makes switching back and forth between running processes quick and painless. If you want a more stylish method of cycling through open programs, Windows + TAB will do the job for you.
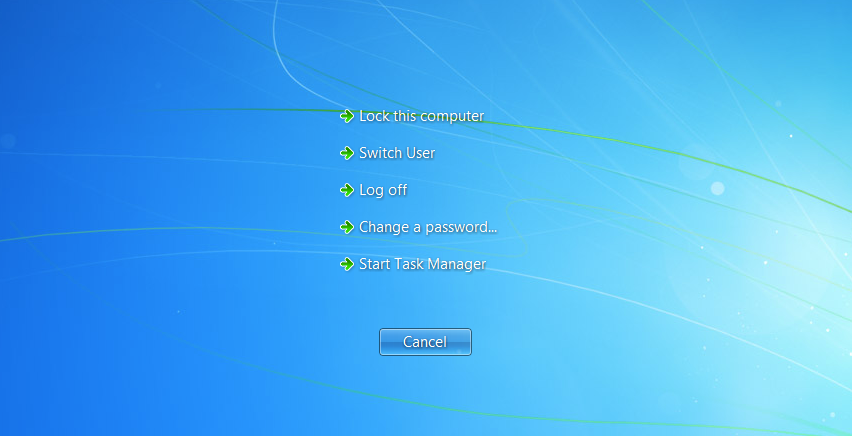
Interrupt all processes CTRL + ALT + Delete is one of the most common PC shortcuts, and one almost everyone is familiar with. The important thing to note is that it interrupts all processes, including the one that is bogging down your system, which can mean the difference between needing to restart or not.
Close the current program Typing ALT + F4 will close the program that is running. This is useful as it saves you time mousing over the "X" and clicking. People will often use this as a joke, telling you to press ALT + F4 to fix a problem. Don’t fall for it unless you want to close what you are doing.
Minimize all windows Sometimes you have a bunch of stuff running, and you want it all to go away so you can get to the desktop. Simply pressing Windows + D will minimize everything you have up, which will save you some time pressing the minimize button for each window. It should be noted that Windows + M offers similar functionality, but there is no undoing, so Windows + D is the more favorable approach.
Open the task manager directly If you want to bypass the interrupt that happens when pressing CTRL + ALT + DEL and jump right to the task manager, typing CTRL + Shift + ESC launches it directly.
Close the current window/tab Stick of moving all the way to that X button? Press CTRL + W and the current window will close. (Don’t do it now, or you will miss the rest of the tricks!)
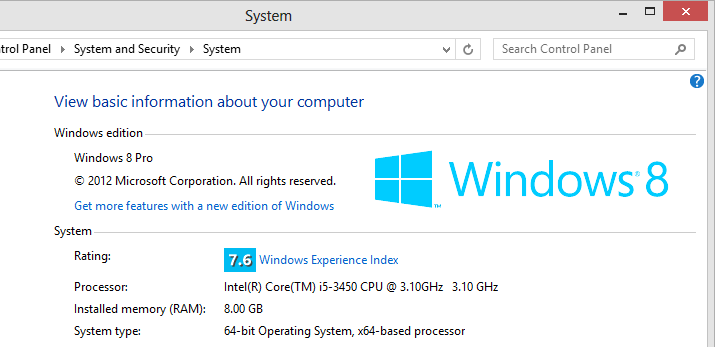
Bring up the system information window This is so much quicker than digging this out the traditional way... Just press Windows + Pause/Break and the System Information panel will be ready to go. This might be the only use for the Pause/Break key you will ever find, so enjoy it!
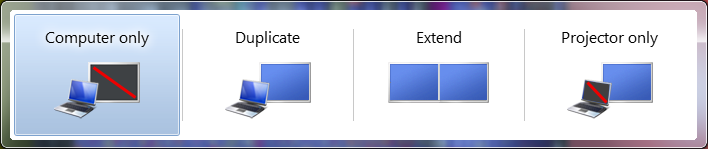
Better multiple monitor control There are several useful keyboard shortcuts for controlling open windows on multiple monitors. Pressing the Windows Key + Arrow Keys will cause a window to quickly snap to each side of either monitor. Alternatively, hitting Shift + Windows Key + Arrows will cause the window to jump to the other monitor. Lastly, pressing Windows + P will allow you to quickly set up a second display or projector.
Web Browsing Tricks

Automatically add www. and .com to a URL You can shave off a couple of seconds typing in a URL by simply click CTRL + Enter after you type the name of the site. Need .net instead of .com, press CTRL + Shift + Enter instead.

Jump to address bar There are a number of ways to jump right to the address bar from anywhere in browser. Pressing CTRL + L, F6, and ALT + D all accomplish this goal.
Bring back a closed tab We covered this already, but it's super useful. Accidentally closed a tab? Simply press CTRL + Shift + T to reopen the most recently closed tab and get back to what you were doing.
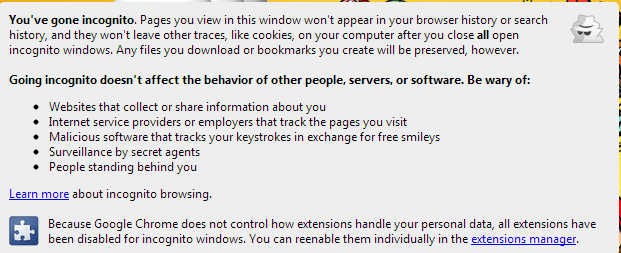
Use private browsing The uses for not having cookies and history saved are obvious for certain activities, you know, like shopping for gifts on a shared computer (of course!). Pressing CTRL + Shift + N will launch a new private in Chrome, CTRL + Shift + P will do it in Firefox and Internet Explorer.
Cycle through open tabs Pressing CTRL + TAB while in a browser will flip between each one. This can be much faster than moving the mouse and clicking on a tab. CTRL + NUM (1, 2, 3, 4, n..) will also take you to certain tab in that numeric order.

File Management Tricks

Rename a file quickly Right-clicking and selecting rename is not very efficient. Instead, simply press F2 while a file is selected to change its name. To alter the name of another file, type TAB without deselecting the current file.
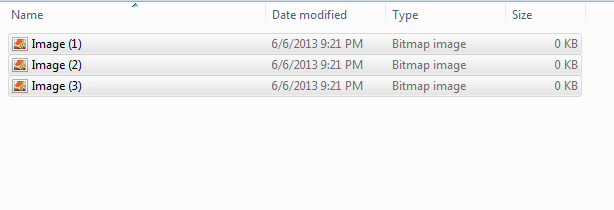
Rename files sequentially in Windows You actually don’t need to download any programs to perform a batch file rename in Windows. Instead, you can select all the files you want to change, right-click the first one in the list, select rename (or use F2), and type in the name. This will automatically change all the other files with the same root name with a suffix: (1), (2), and so on.
Select multiple files using the keyboard To select a bunch of files using your keyboard, you can press Shift + down arrow to select a single file or Shift + Page Down to select a large group of files at one time.

Security Tips

Run programs on an infected PC Often times, malware will prevent a computer from running certain programs. Changing the name of the .exe file can often override this. If that doesn’t work, changing the extension to .com is another useful alternative, and the program will still be able to run in spite of the extension change.
Read installers Even major programs can install toolbars and other unwanted pieces of software during installation. Take a few seconds to read each step to make sure you are not agreeing to install something other than the program you were actually seeking. Far too often people just push next over and over, and end up with a browser covered in various search bars that just aren't needed. In the worst of scenarios, these can have nefarious intentions.
Lock your computer if you get up Sick of your "friends" going onto your computer at work or home and posting things on your Facebook/Twitter page on your behalf? It’s certainly an annoyance, but an easy one to prevent. Windows + L will lock your system right away, requiring a password (if you've set one) to log in again.

Program-Specific Tricks

Photoshop: Drag the marquee without losing the ability to size it The marquee tool is, at its most basic level, designed for selecting a part of an image. It’s used constantly in Photoshop, and there is a handy trick many users miss. While dragging it around, you can press space, which will allow you to size it while moving it. This saves time by letting your perform two key functions at the same time.
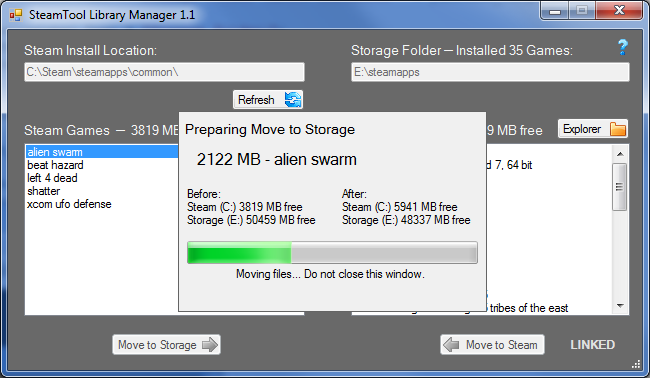
Steam: Move games to another drive or partition By default, Steam installs all games to the same HDD or partition, but what happens if that fills up? The solution: download Steamtool Library Manager. It makes it easy to move games to another hard drive without messing with the functionality of Steam.
VLC: Fix unsynced audio and subtitles In the popular media player VLC, if your audio loses sync with the video or subtitles, there is an easy way to fix this. Simply pressing J or K will move the audio forward or backwards. Similarly, to sync the subtitles you can press H or G.

The combination of using these tips and tricks on a daily basis will most certainly make your computer life much more enjoyable, or at least more practical. And so, did you learn a thing or two that you didn't know before?

How to Change the Start Screen Background in Windows 8

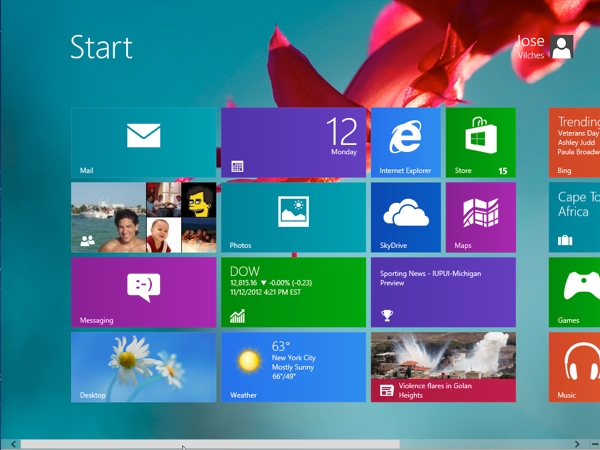
Windows 8’s new Start screen has been hotly debated since the Operating system launched in preview mode earlier this year. Acknowledged by some as a bold step into the tablet market, and criticized by many others who prefer the familiar desktop experience, the new 'Modern UI Style' home is here to stay. But beyond not offering a way to bypass this screen (not without the help of third-party utilities), surprisingly Microsoft is also limiting your options when it comes to customizing the Start screen's appearance. You can choose from a couple color schemes and 10 stock background images, but that's about it.
We've seen some workarounds before but they require firing up the HEX editor to modify system files, and you are still limited to 256-color background images in a handful of specific sizes. That’s more work than most people are probably willing to bother with and as you can imagine the results are not quite optimal.
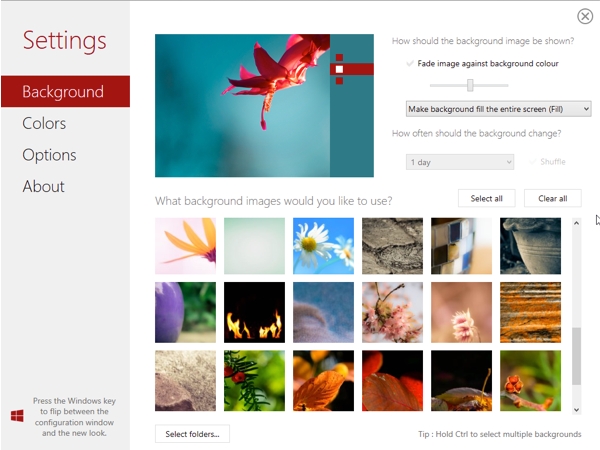
Enter Decor8. Stardock’s latest Windows 8 customization app removes this limitation by giving users the ability to pick any picture they want, regardless of size or color range, as the Start screen background.
Change Windows 8 Start screen background
The program is pretty straightforward to use. Upon launching Decor8, you’ll be presented with a set of background images to choose from, including the start screen and desktop background images that Windows 8 ships with and also a set of wallpapers that Stardock ships with the app. You get the usual fill, fit, tile and center options available in the classic desktop, and the program will automatically create a color scheme to match each of your background images -- or you can manually customize the color scheme if you’re so inclined.
You can add folders to the program to use your own photos and images as background. There’s also the option to select multiple background images by holding down the Ctrl key, and have them rotate on a set time interval, as well as the option to fade background images against the start screen color for a subtle effect.
Change Windows 8 Start screen background
Sadly, Decor8 is not free. Stardock offers a free 30-day trial but otherwise asks a modest $4.99 for the app. It’s a little unnerving to pay for such basic functionality but if you wish to customize the Windows 8 Start screen beyond what Microsoft offers this is the easiest-to-use tool we’ve found. It does one thing and it does it well.

Lock the Computer Before you Go!


http://icons.iconarchive.com/icons/artua/mac/512/Lock-icon.pngIf you work in a network environment you probably have to log onto your computer each morning using a password and remember to log off each evening before you go.  And for network security reasons you're probably reminded to never leave your computer while it's logged on.  This is especially important in a school setting where a malevolent student could potentially make a real mess of the school network if they had access to a teacher computer.


Today's tip will help you with a quick way to log on and off your computer when you have to step away from it for a few minutes.  It will save you time as you won't have to log off and then back on again.  Instead you can just "Lock" your computer while you're away from it temporarily.  Please note that this will not work in all network environments or all operating systems.  But you can still give it a try:
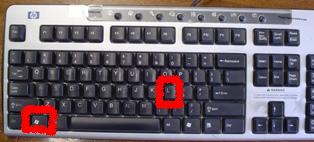
To lock your computer press the Windows button (bottom left of your keyboard) and the letter "L" at the same time. 
Lock your computer
If it works your screen will go blank except for a message that says:
"This computer is in use and has been locked by (Your Username).  To unlock this computer press CTRL+ALT+DEL and type in your password"
This can be a great, easy to use way to lock your computer.  It doesn't work on all computers though.  If it doesn't work on your computer you'd have to contact your network administrator to ask them about it. Some network administrators decide to disable this feature.

 Windows key and L
Lock your computer
Windows shortcut keys

Add Floating 'Contact Me' Button To Blogger

How To Add Floating Contact Me Button To BloggerWe also know that how important are visitors for us. But how to interact with them? There are many ways like adding a contact me link to footer, sidebar or in navigation menu. But adding floating contact me button is best choice. This will help your visitors to easily find contact button.  Adding Floating Contact Me Button is best way to interact with your visitors and make them love your blog.  Now You can Add Floating Contact Me Button To Blogger. You just need to place below code just after <body> to add floating button and link it to your contact me page.


How To Add Floating Contact Me Button To Blogger

Follow following simple steps to add floating contact me button to blogger. But Backup Your Template first.
  • Goto your Blogger Dashboard > Design > Edit Html
  • Click on Expand Widget Template
  • Now Search for <body>
  • and replace <body> with below code

<body>
 <a href='http://allbloggingtips.com/contact-us' style='position: fixed; top: 40%; z-index: 4;'><img border="0" height="170" src="https://blogger.googleusercontent.com/img/b/R29vZ2xl/AVvXsEhCIJbs5CMNz5EC46mNQLGW4GKlMZddYfFd1D4SEa-TkmJsbcRa2IkWwdH6N1B_laXE8mh_dNp8m-XGhe9kF3g-UZC9N2NqyP0UYdkp8lLgsJiv52gaejx64s-lNziWnvAZqqcZix54giWR/s200/floating+contact+me+button.png" width="40" /></a>

And click on save but before saving it read next part of article below.

Customization

Make following changes to above code.

Replace http://tec-around.blogspot.com/p/about-us.html  with you contact us page.

Now you have done sace your template and is you Add Floating Contact Me Button To Blogger. do comment if you face any problem.!!